Create Kubernetes Cluster in Azure
Kubernetes is an open source container orchestrator that automates deployment, scaling, and management of operations. A Kuberenetes cluster can be created through Azure Portal or through Azure Cloud Shell.
Using Azure Portal
When using Azure Portal, following steps will let you create a Kubernetes cluster in Azure.
From the Azure portal, go to Resource groups from the left most pane of the window.
From the list of resource groups, left click on your resource group (created in Create Azure Resource Group).
Left click on the + Add button on the top left corner.
In the search bar, under the New tag, type Kubernetes Service.
Press enter to get the following screen as the search result.

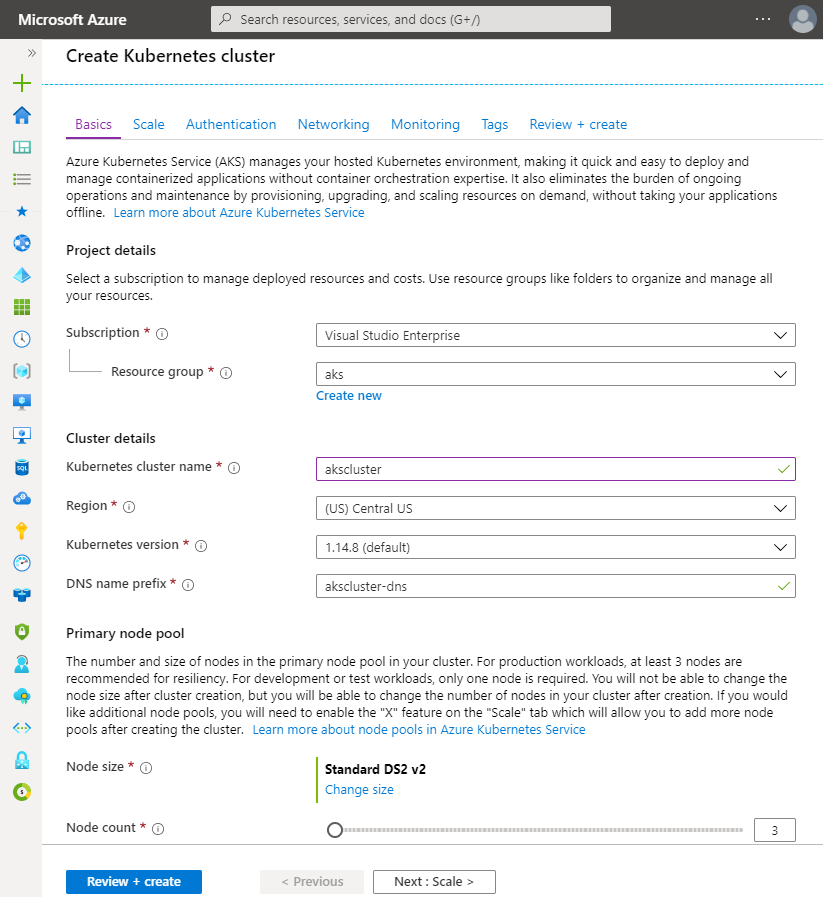
Left click on the Create button. On clicking the button, you will be redirected to a Create Kubernetes cluster page.
At the Create Kubernetes Cluster page you are going to create the required Kubernetes cluster. Add these details according to your requirements.

Tip
Mainly, you only need to provide a name for your Kubernetes cluster and the rest can be left as default but to have more control over your cluster, you can modify Region, Node count and Node size accordingly. Also, you have the options to scale, monitor, add authentication, networking and tags in your Kubernetes cluster to have a more optimized cluster.
Click on the Review + Create button at the bottom of the window to review the provided details.
Once the validation criterion is met, you will be notified as thus,

- Click on Create to create your Kubernetes cluster. This creation process usually takes a few minutes to complete.
Using Azure Cloud Shell
- After the resource group has been successfully created, create a service principal and configure its access to Azure resources through the following command
az ad sp create-for-rbac
This command will return an output such as:

- Use the appId and password from the results of the previously executed command in the command below. This will create an Azure Kubernetes Service cluster for you.
az aks create --resource-group aksgroup --name akscluster --node-count 2 --service-principal 'appId' --client-secret 'password'
Connect to Kubernetes Cluster
After the Kubernetes cluster is created successfully, you need to connect it.
Use the following command to get the credentials of your newly created AKS cluster and get them saved on the local machine.
az aks get-credentials --name akscluster --resource-group aksgroup
The next step after creating a Kubernetes cluster is to create NCache deployment which is explained in the next chapter.
See Also
Create Azure Resource Group
Create NCache Deployment in AKS
Create Gateway Service in AKS
Create Discovery Service in AKS