The adage “640 KB ought to be enough for anybody” used to be widely accepted. There is some disagreement over who said it, but there is now universal agreement that no one can ever know what “enough” in computing means.
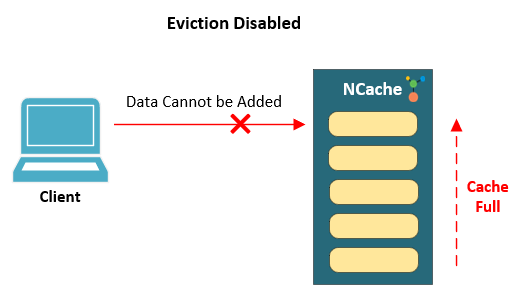
Because of this, you must delete or evict some cached data when you set up your caches with an estimate of the amount of data they can hold. Without eviction, if the cache fills up, no incoming requests for data addition are accepted because no data is being removed from the cache.
Figure 1 explains this in a simple illustration:

Figure 1: Eviction disabled on cache
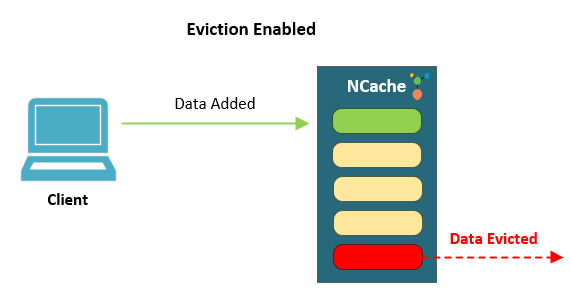
Having eviction enabled means your cache will remove the data based on usage or priority compared to other cache items. This frees up space for incoming data that can be added to cache once older/lesser priority items are evicted from the cache. Figure 2 illustrates this for clarity.

Figure 2: Eviction enabled on cache
We will be discussing how NCache supports and handles different eviction policies, and how it can be enabled on the cache.
NCache Details Configure Eviction – NCache Docs NCache Client API Docs
Eviction Policies in NCache
NCache provides various flavors of eviction to accommodate any use case.
Least Recently Used (LRU)
One of the most commonly used eviction policies is LRU. This eviction policy lets caches evict the oldest cache items that have not been in use for a long time as compared to the items accessed recently. The data is evicted based on its last access time. The access time is updated as a timestamp for each cache item when it is either fetched from or updated in the cache.
Let’s say your cache contains data for products that are being viewed by customers. Once your cache is near to full, it makes sense to evict the products that have not been viewed for some time.
Least Frequently Used (LFU)
This eviction policy evicts less frequently used cache items. In LFU data is evicted based on the frequency of its usage/number of hits against the item. For example, if an item is accessed 5 times, it is a more suitable candidate for eviction than an item that is accessed 20 times. This is useful for scenarios where a hot selling item is being viewed by customers and you need to evict the cache. Evicting an item that has not been accessed as much as the hot-selling item will not impact your user experience.
Priority Based Eviction
Priority-based eviction evicts lesser important data from the cache first. If you can prioritize your cache data, this eviction policy must be adopted for greater control over how data is evicted. The priority is specified while adding the cache item to the cache. You can specify any priority from the following levels of priorities:
- Low
- Below Normal
- Normal
- Above Normal
- High
- Not Removable – This priority level specifies that the cache item should not be evicted and can only be configured using NCache API.
This is how you can easily specify the priority of each item while adding it to the cache:
NCache Details Configure Eviction – NCache Docs NCache Client API Docs
Bulk Removal of Eviction Items
During eviction, items are removed in bulk so that performance is not impacted by evicting items individually. NCache provides you the ease to customize the bulk size and delay between two consecutive bulk evictions according to your requirement.
In the Alachisoft.NCache.Service.exe.config file in %NCHOME%/bin/service, you can configure these settings through the following tags. For more detail, refer to the documentation on Configuring Eviction Settings.
Bulk Size for Eviction
You can specify the number of items to be removed in one bulk call.
Eviction Bulk Removal Delay
You can specify the delay (in seconds) between the eviction removal calls as shown here. A value of zero would mean no delay in eviction and items will keep on evicting.
Enable Eviction through Web Manager
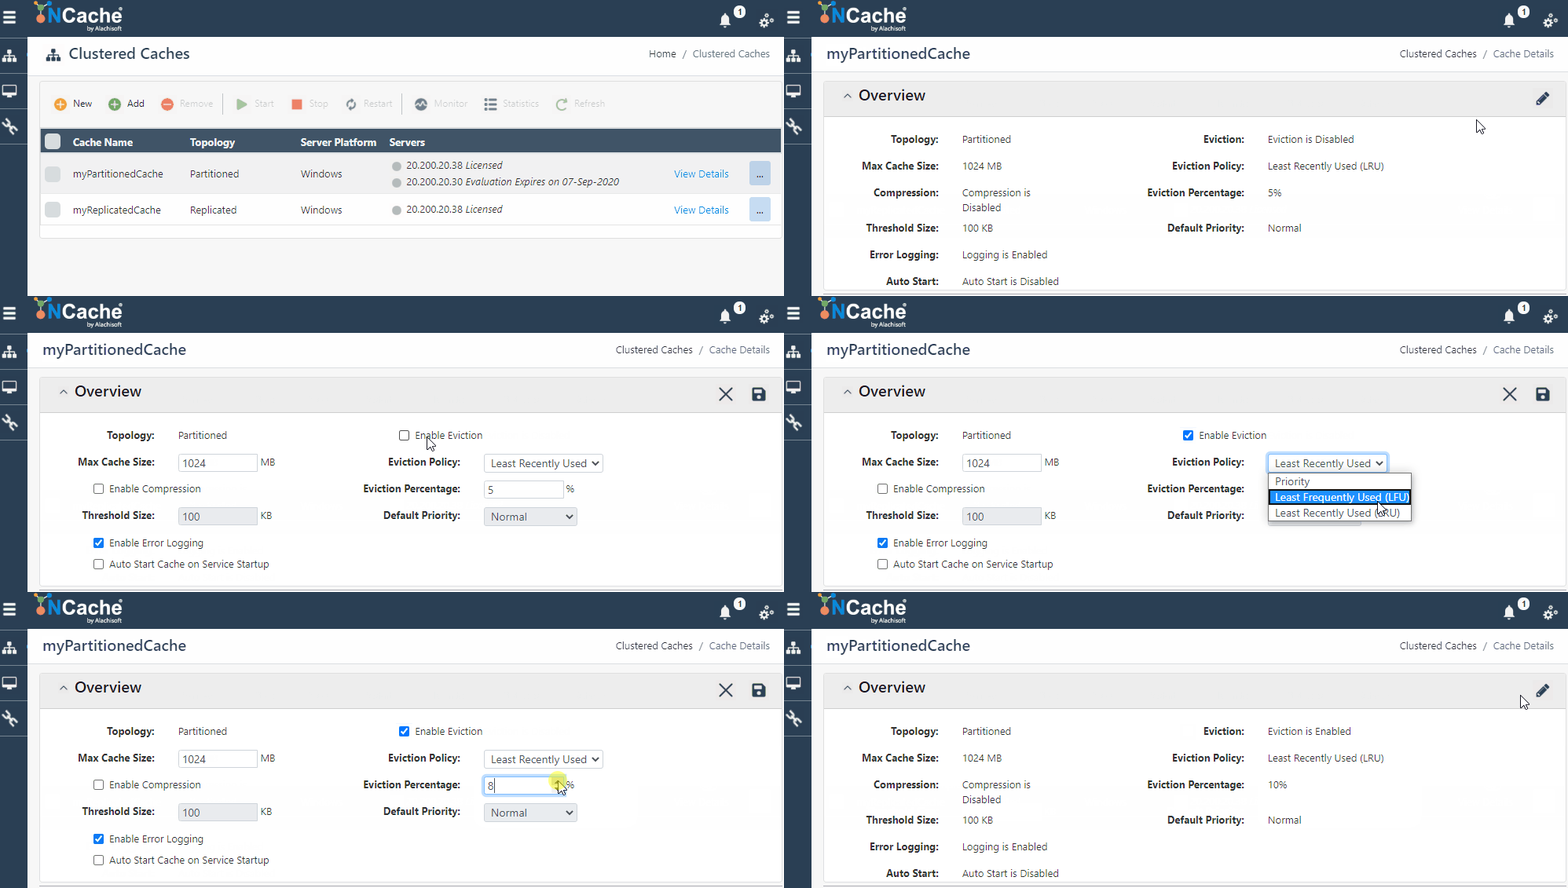
You can enable eviction through a series of few simple steps. Once you enable eviction, you can customize the eviction ratio (the percentage of the total cache size to be evicted) and specify the policy and priority.
- Figure 3: Enabling eviction in NCache Web Manager
Enable Eviction through Config Files
You can also configure eviction through changes in the cache configuration file (config.ncconf). Under the <cache-settings> tag, add the following <eviction-policy> tag:
NCache Details Configure Eviction – NCache Docs Edition Comparison
Eviction in Clustered Environment
- Once eviction is enabled, eviction is intelligently handled by NCache in each cache topology:
- Partitioned/Partition-of-Replica Cache: In Partitioned and Partition of Replica topologies, since each node has partition of data, so each node is responsible to evict its own data. For the replica node in partition-of-replica, data is automatically removed when it is removed from the active node.
- Replicated Cache: In Replicated topology, every node has the same set of data, so only the cluster coordinator is responsible for eviction.
- Mirror Cache: In Mirror cache, the active node is responsible for carrying out eviction on the entire cache.
Conclusion
For cache operations to apply on the cache without any interruption, you need to ensure your cache keeps fresh data and evicts any unwanted data. This is where eviction comes into play. Configuring eviction is simple, and the rest is handled by NCache itself.


