Linux’s security, stability, and reliability have undoubtedly made it the language to use for critical applications. In fact, even Microsoft opted for it as the OS to power the Azure Cloud Computing Services. Given all this, is it any surprise that NCache (a platform most commonly employed with critical high-traffic applications for banks, airlines, and more) offers a Linux option for its much-lauded Enterprise edition? The following is a comprehensive guide to downloading, installing, running, and managing NCache servers in Linux.
Download NCache Enterprise
Before we kick off this process, however, do make sure that your Linux setup is equipped with .NET 6.0 and PowerShell 7.0 or newer. Though, if ensuring and hunting for these installations seems like too much work, you can download this script and run the following command in the terminal:
However, this is an installation process, and you can’t skip all the hassle of downloading. Thus, to begin, you have to download the NCache tar.gz file, which is also accessible on the NCache website on the download page (where you will have to sign up with your work email).
Installing NCache Enterprise
Extract the tar.gz file as follows:
Direct your terminal to the resulting directory after running the previously mentioned command. Next, you proceed with the actual installation, provided you know the installation mode you need. NCache offers its users three options:
- The NCache Server Mode includes the full server product – including the local client.
- The NCache Client Mode includes ASP.NET Session modules, the NCache API, and the local and client caches.
- The NCache Developer Mode includes a stand-alone cache (with cache quantity, size, and the number of requests).
For this blog, only the server mode installation will be discussed. To do so, you must copy the installation key Alachisoft would have emailed you at the address provided during the NCache download. After which you can return to the terminal and type out the following (you can adjust it based on your preferences and the properties available):
Missing any of the required fields will result in an installation error. Although, you should note that using -s will automatically start the default cache (e.g. demoCache). But outside of such an error, you are now free to set up your environment, create, and manage your clusters.
Setting Up Your Environment for NCache
While in most cases, the NCache Service will start upon installation. Keep in mind that without admin access you cannot install access. Thus, you will have to run the following:
Managing Your NCache Cluster
At this point, you have two options. You can either use the NCache Manager or its PowerShell tool. For the former just open the browser of your choice and browse to “<server-ip>:8251”. Whereas for the second option, you can use your terminal to switch to PowerShell using “pwsh” and import all necessary modules:
This blog will mostly employ the latter and use the cmdlets imported in the previous command.
Create a New Distributed Cache
In order to manage clusters, you first have to set up clusters. As such, please run the following command in your Terminal, with properties adjusted as you feel appropriate:
Following this, you may add a server node using the Add-Node cmdlet and start your cache:
Monitoring Your Cluster
To make sure everything is running as expected, you can simulate NCache usage, using the following command – where the reporting interval represents the specified interval (in seconds) after which the item count gets displayed.
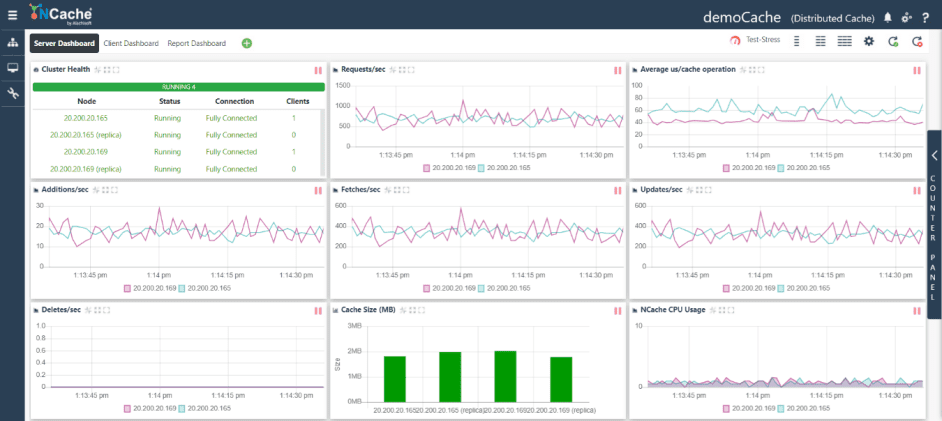
You can also monitor the results using the NCache Manager, specifically the NCache Monitor and the cache statistics options.

Figure: NCache Monitor
Adding Data to Your Cluster
The data in question can come as a result of basic CRUD operations, pre-loaded datasets, and more. All these sources have to be defined via client applications employing the NCache API, NCache supports a variety of clients (.NET, Java, Scala, Node.js, and Python). To get started quickly, you can download the entire NCache Samples repository from GitHub.
Conclusion
Undoubtedly, NCache Enterprise on Linux offers users just what they are looking for when they turn to any Linux-based software. In addition, it offers comprehensive guides on installing and running the platform to make things as easy as possible for even those users just getting acquainted with Linux. So, what are you waiting for? Download now and get started with your 60-day free trial.
