Nowadays, Cloud deployments for applications have become a common practice. One of the major reasons for this popularity is the ease of use that Cloud infrastructures are offering. Microsoft Azure is one such popular Cloud platform that offers several deployment services for its subscribers. NCache with a vision of facilitating its clients and incorporating all the technological advancements offers NCache Enterprise Cloud. It spins NCache servers so that if you have a subscription either with Azure or AWS, you can quickly avail of a free trial of NCache Cloud for 60 days.
Once you have specified your required subscription, NCache Enterprise Cloud will spin the NCache Server VMs based on the specified subscription and the number of required servers. This will pre-install the VMs where you can directly create a cluster and start the operations. Like in most other Cloud applications, you can deploy NCache Enterprise Cloud Manually as well as Automatically.
This blog will guide you through the manual deployment of resources in Azure. The manual deployment method provides great ease for users who are reluctant to share certain access rights of the application, as it uses scripts for deployment. But, if you are comfortable with sharing information like details of user rights, you can also check the blog on Automatic Deployment (have to link), and decide which method suits you better.
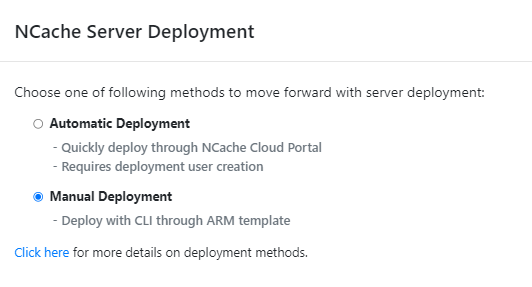
Figure1: NCache Enterprise Cloud Azure Deployment Methods
How to Manually Deploy NCache in Azure?
To manually deploy NCache in Azure follow the below steps:
Step 1: Account Registration in Azure
To use NCache Enterprise Cloud (Free 60-day trial) the user must have a subscription to the SaaS product on Azure. To subscribe to the SaaS, you have to log in to the Azure portal, from where you need to choose NCache Enterprise Cloud from the marketplace and subscribe to it.
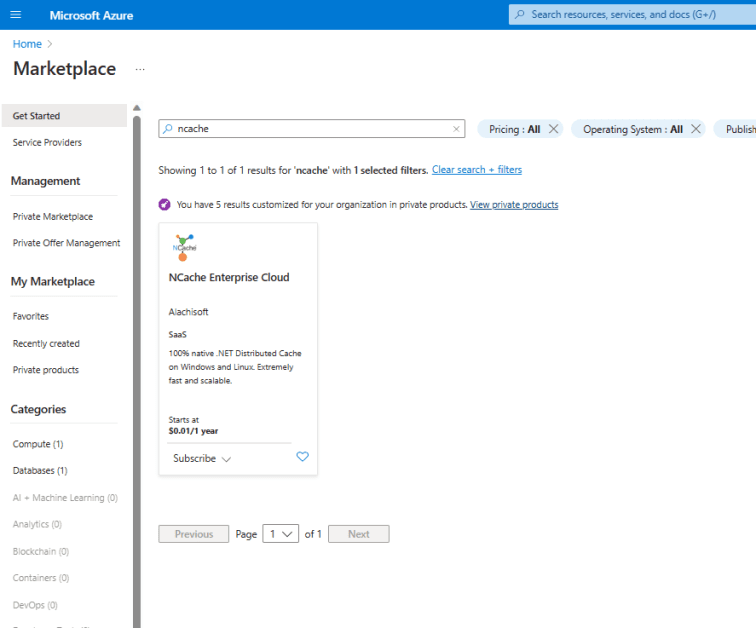
Figure 2: Search Result for NCache Enterprise Cloud on the Azure Market Place.
Once you are done with the subscription, you can proceed with account registration on the NCache Cloud Portal by providing your user account and company details. For user identification, you need to fill out a registration form and get a one-time password (OTP).
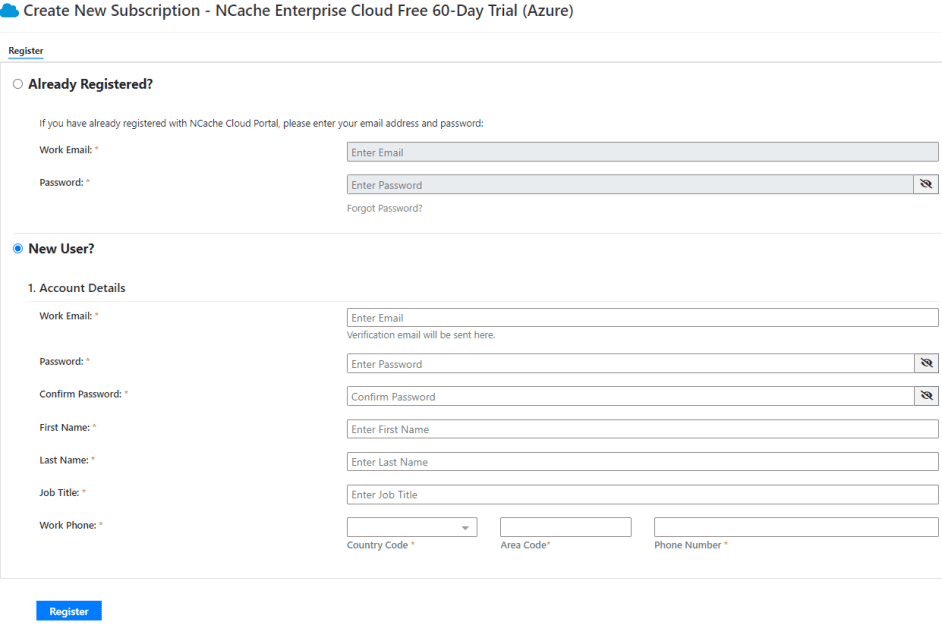
Figure 3: Registering a New User in Azure
Step 2: Deployment in Azure
After account registration, proceed with the deployment configuration, and configure the VM server based on the number of cores and memory size. After configuring VM servers, choose the appropriate number of servers for your cache cluster and enter the username and password.
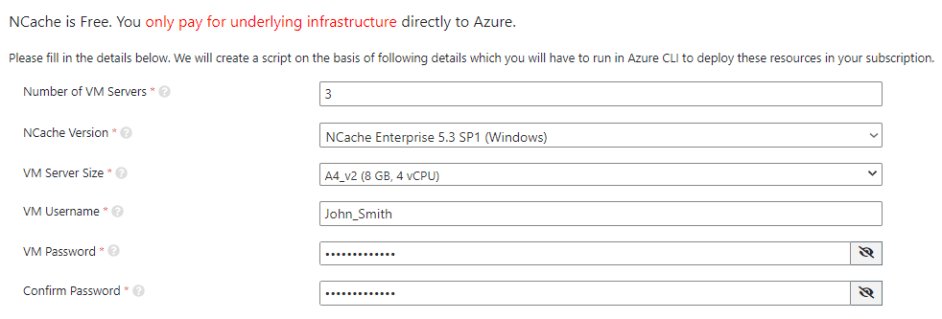
Figure 4: Resources Deployment in Azure
Specify the Azure subscription, resource group, VNET, and Subnet and move forward to the dashboard displaying your subscription details and deployed servers.
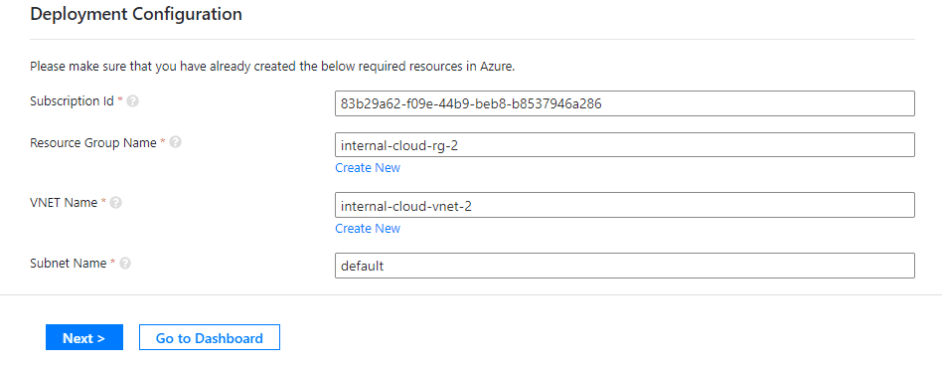
Figure 5: Deployment Configuration in Azure
Step 3: Deploy NCache Servers
Based on the above information NCache Cloud Portal will automatically generate a user script to create your VM in Azure. Copy the script, Launch Azure CLI, execute the script there, and click Finish to view the dashboard. The deployed servers will be visible on your dashboard in the following way.

Figure 6: Virtual Machines Displayed on the NCache Enterprise Cloud Dashboard
Usage of NCache on Virtual Machines
After successfully deploying and accessing your VM you need to configure NCache to start using the features provided by NCache.
Connecting to NCache Servers
You can manage virtual machines through the NCache Cloud Portal by performing different management operations like starting, stopping, restarting, and removing a VM. You can also perform different server actions like reviewing server information, accessing the NCache Manager and virtual machines through the remote desktop connection when using a Windows-based VM, and SSH into the machine when using a Linux-based VM.

Figure 7: NCache Manager Displaying Server Actions
Creating a Cache Cluster
After registering the machine for NCache evaluation you can create a cache cluster via the NCache Manager or NCache PowerShell cmdlet.
Simulating a Stress
To monitor NCache’s performance under high loads, NCache provides a Test-Stress cmdlet through which you can monitor its behavior in a highly transactional environment. To monitor the cache cluster in such situations, deploy a machine in the resource group where your servers are running. Install the PowerShell module on your deployed machine and configure the NCache Client through it. After successfully configuring NCache on your deployed machine run the Test-Stress. It will simulate a high transactional load on the specified cache to monitor how NCache performs under stress.
Monitoring Statistics
Along with the management of cache cluster operations, the NCache portal also allows you to monitor these operations by using different performance counters provided by NCache. You can monitor these counters using the NCache Monitor Dashboard or the NCache Statistics Dashboard. NCache provides a Cache Statistics option that updates all server and client counters at runtime. To browse Cache Statistics to monitor your newly created cache cluster’s activity, follow the help on Browse Cache Statistics. This is how you can use and monitor your NCache Enterprise Cloud in Azure.
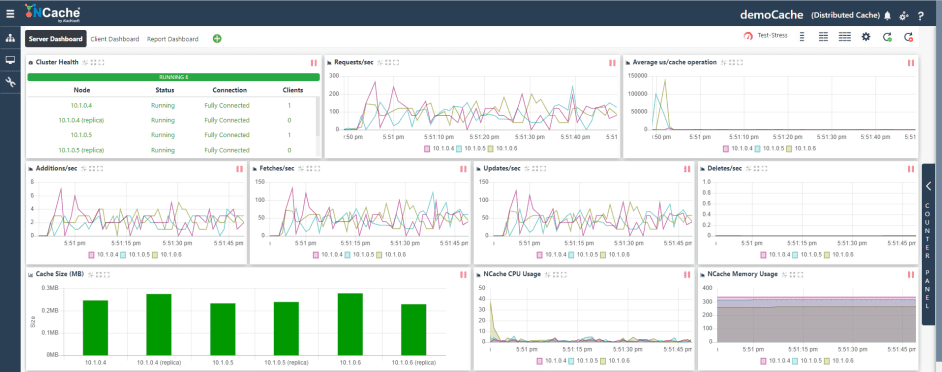
Figure 8: Monitor Cache Cluster through NCache Manager
Conclusion
Manual Deployment of NCache facilitates enterprises by providing more control over the configuration and customization of their cache clusters. To learn more about NCache Enterprise Cloud in Azure and AWS platforms, please go through the following guides Getting Started with NCache Enterprise Cloud in Azure, and Getting Started with NCache Enterprise Cloud in AWS.


