Stop Cache using Web Manager and PowerShell
You can stop a clustered cache on all the nodes altogether or stop it on a specific node.
Stop Cache on all Server Nodes
Using NCache Web Manager
Launch NCache Web Manager by browsing to
http://localhost:8251(Windows) or<server-ip>:8251(Windows + Linux).In the left navigation bar, click on Clustered Caches or Local Caches, based on the cache which is to be stopped.
Check the box against the cache to stop.
Method 1: Click on the
button on the toolbar to stop cache.

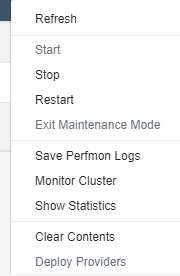
Method 2: Click on "..." against the cache and select Stop.

The icon against the cache servers will change from blue to grey, and a success notification will be received.
Stopping Cache on a Particular Server Node
Using NCache Web Manager
Launch NCache Web Manager by browsing to
http://localhost:8251(Windows) or<server-ip>:8251(Windows + Linux).In the left navigation bar, click on Clustered Caches or Local Caches, based on the cache server to stop. Against the cache name, click on View Details.

This opens up the detailed configuration page for the cache.
Under Server Nodes tab, check the box against the server node IP to stop.
Method 1: Click on the
button on the toolbar to stop the server.

Method 2: Click on "..." against the server IP and select Stop.

The Status of the server will change from Running to Stopped, and a success notification will be received.
Using PowerShell
Stop-Cache cmdlet enables users to stop the cache.
The following command stops the cache named demoClusteredCache on the specified server '20.200.20.29'.
Stop-Cache demoClusteredCache -Server 20.200.20.29
See Also
Start Cache
Restart Cache
Manage Cache Service on a Server Node